Plumbing & Appliances
Over-the-range microwave installation, done right the first time
Install an over-the-range microwave: mounting plate and template, cabinet bolts, the three venting setups, rotating the blower, cord routing and clearances.
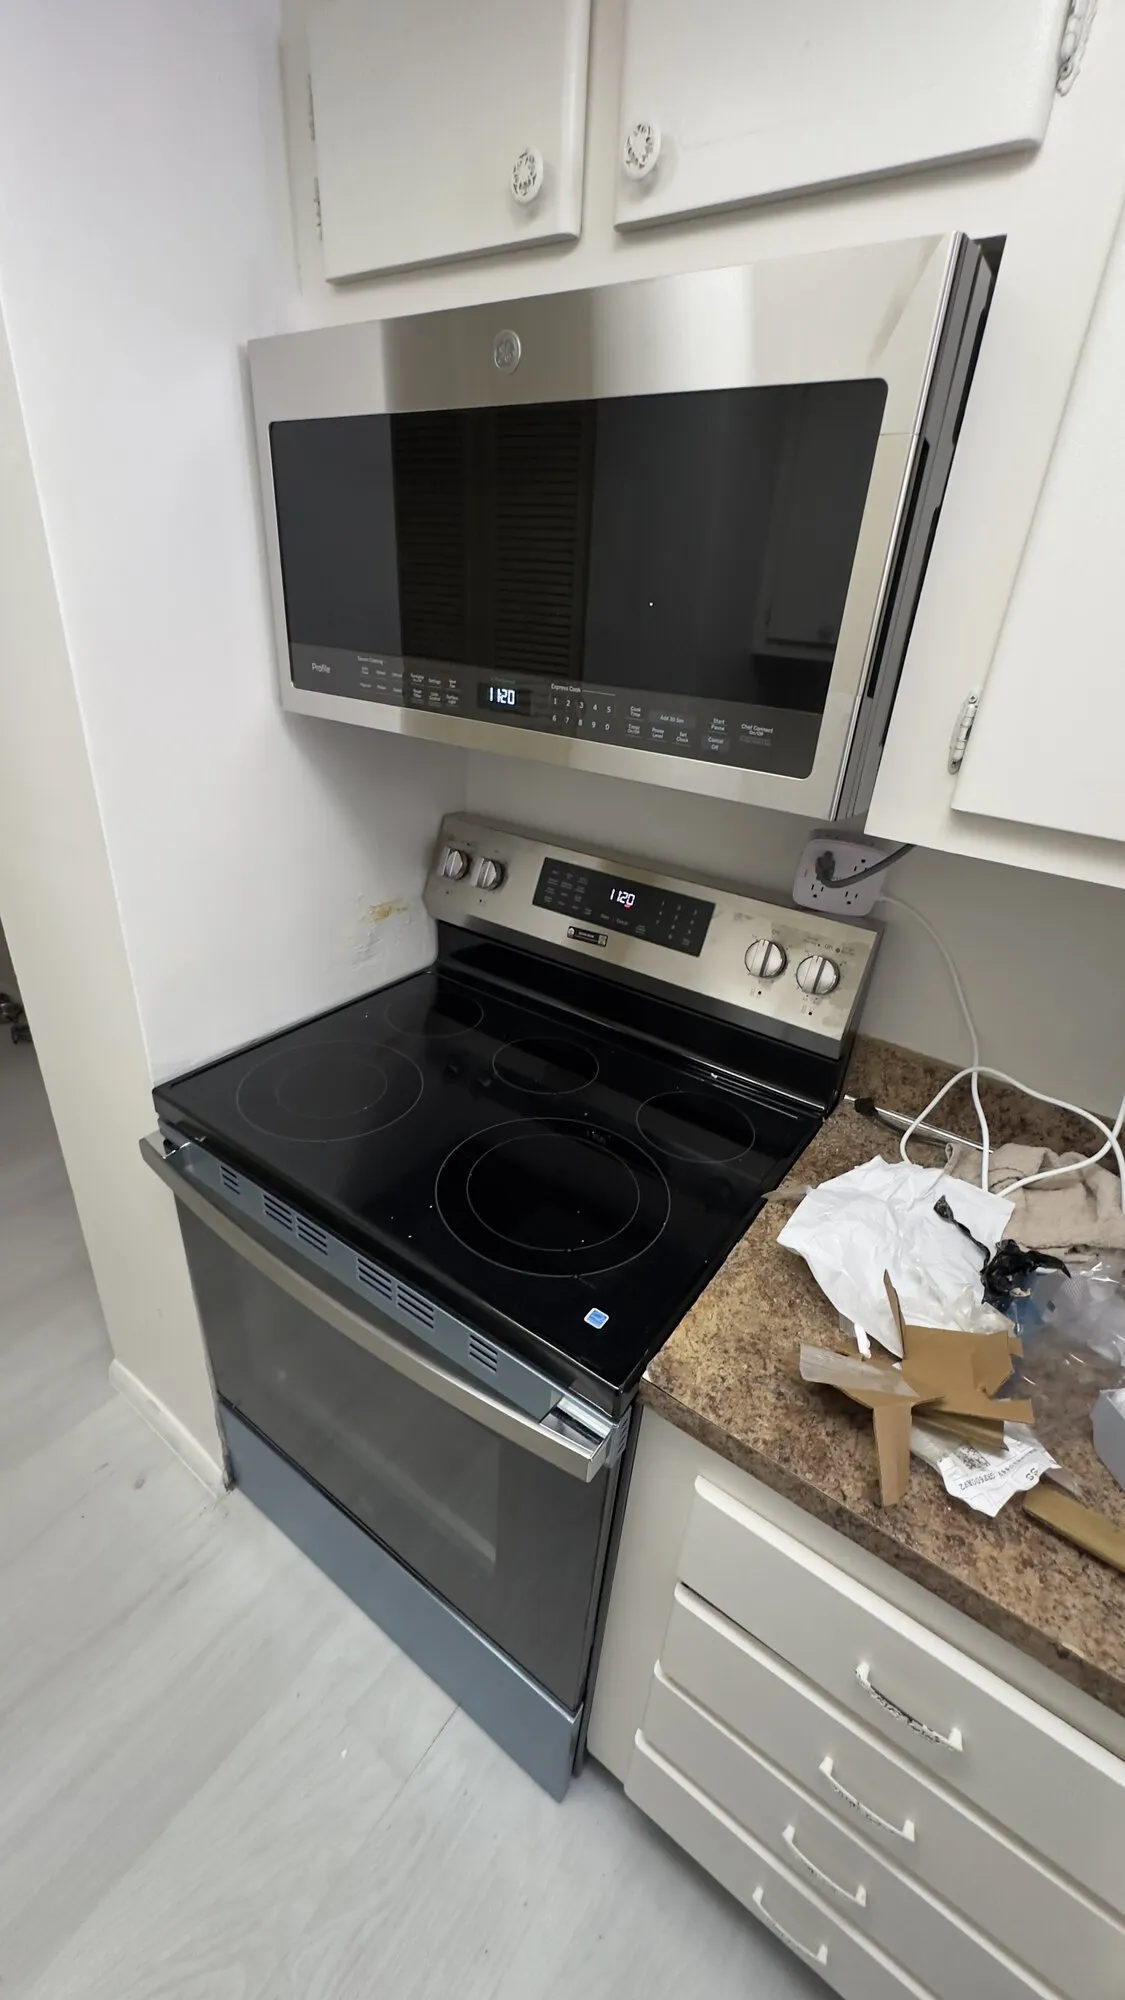
An over-the-range microwave is one of those jobs that looks like a two-screw appliance swap and turns into an afternoon. The unit is heavy, it goes up at head height over a glass cooktop, and half the work is deciding and configuring how it vents before it ever touches the wall.
The good news is that every one of these installs the same way. Mounting plate on the wall, two bolts down through the cabinet above, and a blower that you configure for one of three venting paths. Get the venting decision settled first, because it determines what you cut and in what order.
What you need
- The installation manual and the paper template that came in the box. Do not lose it
- A helper. Non-negotiable
- Stud finder, plus a hammer drill and masonry bit if the wall is block
- Drill and driver, plus the bit sizes the template calls for
- Level, tape measure, pencil
- Jigsaw or a rotary tool for cutting the cabinet bottom, if you are ducting vertically
- Screwdrivers, nut driver set
- Toggle bolts or heavy wall anchors for any bracket hole that does not land on framing
- Masonry sleeve anchors if the wall behind is CMU
- Rigid metal duct, 3-1/4 by 10 in rectangular is the standard section for this appliance
- Foil tape for duct joints, not cloth duct tape
- Charcoal filter, if you are recirculating
- Safety glasses and gloves. Sheet metal edges are sharp
Step 1: Decide how it vents, before anything else
This is the fork in the road. Everything else follows from it.
| Configuration | What happens | When it makes sense | Extra work |
|---|---|---|---|
| Recirculating | Air passes through a grease filter, then a charcoal filter, then back into the kitchen through the front grille | No existing duct and no practical route for one. Interior walls, condos, rentals | Buy and fit the charcoal filter. No cutting |
| Vertical | Blower pushes up through the cabinet into a duct running to the roof or an existing vent | There is already a duct above, or the run to the roof is short and clear | Cut the cabinet bottom and shelf, align to the existing duct, fit the damper |
| Horizontal | Blower pushes straight back through the exterior wall to a hood outside | Range sits on an exterior wall with a short, direct route out | Cut or core the wall, install and seal an exterior hood |
Ducted always outperforms recirculating. It removes heat, moisture, grease and combustion products from the room instead of filtering some of them and putting the rest back. If you have a realistic route outside, take it.
That said, recirculating is not a failure. Plenty of South Florida kitchens have the range on an interior wall with cabinets above and no path anywhere. A recirculating unit with a fresh charcoal filter and a clean grease filter is a great deal better than nothing.
The Florida wrinkle on horizontal venting
Most homes here are concrete masonry unit construction: block walls with furring strips and drywall over them. A horizontal vent through an exterior wall is not a matter of cutting a rectangle between two studs. It is core drilling or cutting through solid block, and then properly sealing and flashing the penetration on the outside.
Add to that: coastal salt air eats cheap vent hoods, wind-driven rain during hurricane season finds every unsealed penetration, and most condo and HOA documents flatly prohibit new penetrations of an exterior wall without written approval. Check your documents before you buy a hood. Some of the same considerations that apply to drilling in a South Florida condo apply here, only more so, because this is a hole all the way through the building envelope.
Step 2: Remove the old unit and check the space
If there is an existing microwave or hood, take it down first, with your helper holding it.
- Unplug it, or turn off the breaker if it is hardwired.
- Remove the two bolts through the cabinet bottom while your helper takes the weight.
- Tilt the bottom of the unit out and lift it off the mounting plate hooks.
- Remove the old mounting plate.
Now measure the opening. Standard over-the-range microwaves are 30 in wide, and the cabinet opening should be too. Measure the height from the cooking surface to the bottom of the upper cabinet, and compare it to what your manual requires.
On clearance, follow your manual and only your manual. The number varies by model, by manufacturer, and by whether the range below is gas or electric. The typical arrangement puts 30 in between the cooking surface and the bottom of the upper cabinet, with the microwave taking up the lower portion of that gap. What you must not do is mount the unit lower than specified because someone short cannot reach the controls. That clearance is a fire specification. The bottom of that microwave sits directly over open flame or a red-hot element.
If the existing cabinet height does not give you the clearance the manual requires, the cabinet has to move. That is a cabinetry job, and it is worth doing properly rather than compromising the clearance.
Step 3: Mount the plate
The mounting plate is a steel bracket that carries most of the weight. The two bolts through the cabinet stop the unit from tipping out. Both matter.
- Tape the paper template to the wall and to the underside of the cabinet exactly as the instructions describe. The template usually has a wall portion and a cabinet portion joined at the fold. Get it centered and get it level.
- Mark the bracket holes on the wall, the two bolt holes in the cabinet bottom, and the cord hole in the cabinet bottom.
- Find the framing. Use a stud finder, then confirm with a small test hole where the bracket will cover it.
- Drill and fasten. Every bracket hole that lands on a stud gets a wood screw into that stud. Every hole that does not gets a toggle bolt or a heavy anchor rated for the load. Use as many of the bracket’s holes as you can, not the minimum.
- Check the plate is dead level before you tighten everything. A crooked plate means a crooked microwave, and there is no adjustment later.
If the wall behind is block
Stud finders are close to useless over furred-out CMU. They pick up the furring strips, which are thin wood strips fastened to the block, and those strips are not structural anchoring for an appliance of this weight.
You need a hammer drill, a masonry bit and masonry sleeve anchors set into the block itself, drilling through the drywall and furring into solid material behind. Same principle as mounting a TV on a concrete block wall: the drywall carries nothing, the block carries everything.
Drill the solid face shell of the block rather than a mortar joint, blow the dust out of the hole before setting the anchor, and do not overtighten a sleeve anchor in old block. The sleeve is meant to expand behind the face shell, so breaking into the hollow cell is normal.
Step 4: Cabinet bolt holes and cord routing
The two bolt holes through the cabinet bottom take the bolts that hold the top of the microwave. Drill them at the size the template specifies, straight down, from underneath or from inside the cabinet depending on access.
The cord hole is separate and usually larger. It goes where the template marks it, and the cord runs up through it into the upper cabinet, where it plugs into a receptacle.
Cord rules, all of which get broken regularly:
- The cord goes through the cord hole, never through the vent opening. A cord in the exhaust path sits in hot greasy air.
- Route it so it cannot be pinched between the top of the microwave and the cabinet floor.
- No extension cords, ever, and no power strips.
- If there is no receptacle inside that cabinet, one has to be added, and that is licensed electrical work in Florida. Many manufacturers call for the microwave to be on a dedicated branch circuit, so check what your manual specifies and hand that requirement to the electrician.
- Deburr the cord hole or fit a grommet if the edge is rough. A cabinet bottom edge will chew through cord insulation over years of vibration.
If you do need an electrician, get the receptacle installed before you hang the microwave, not after. Reaching into that cabinet with an appliance already in the way is miserable.
Step 5: Configure the blower and the damper
This is the step people skip, and then wonder why the new microwave blows hot air back in their face.
Inside the unit, the blower assembly can be rotated to discharge in different directions: up for vertical venting, back for horizontal venting, or into the front grille for recirculating. It ships in one orientation from the factory, and which one that is varies by brand. Read your manual.
The general procedure, and again defer to the manual:
- Unplug the unit. Yes, even sitting on the floor.
- Remove the screws holding the blower assembly, usually accessible from the top or through the filter opening.
- Lift the assembly, rotate it to the orientation the manual shows for your configuration, and reseat it.
- Refit the screws. Make sure no wiring is pinched or stretched by the new orientation.
The damper is the hinged flap that lets exhaust out and stops outside air, insects and backdraft from coming in. It matters more than it looks like it should.
- For vertical or horizontal venting, install the damper in the orientation the manual shows, with the flap free to swing open in the direction of airflow and to fall closed under its own weight when the blower stops.
- Test it by hand before the unit goes up. It should open with light pressure and drop shut cleanly. A damper that binds either kills your airflow or stays open and lets the outdoors in.
- For recirculating, follow the manual. Some models have you remove the damper entirely.
Get this wrong and the symptoms are confusing: weak extraction, a whistling noise, or warm air coming out of a vent you thought was ducted.
Step 6: The ducting itself
If you are ducting, the rules are the same ones that govern any grease or moisture exhaust.
- Rigid metal duct only. Not flexible foil, not plastic. The same reasoning that applies to dryer venting applies here: flexible accordion duct has a ribbed interior that traps grease, it sags, and it wrecks airflow.
- Keep the run short and the turns few. Every elbow costs you meaningful airflow. Plan the straightest practical route.
- Do not reduce the duct size anywhere along the run. Standard section for this appliance is 3-1/4 by 10 in rectangular, or 6 in round with the correct transition fitting.
- Seal joints with foil tape, not cloth duct tape, which dries out and falls off.
- Fasten joints without long screws sticking into the airstream. Protruding screw points collect grease and lint.
- Terminate outdoors properly, with a hood whose damper closes fully under its own weight when the blower stops. That flap is what keeps weather and pests out. Do not screen a grease exhaust, for the same reason you do not screen a dryer vent: it loads up and blocks. Never terminate into an attic, a soffit or a crawl space. That is how you build a mold problem in a Florida attic.
Step 7: Hang it
- Both people, one at each end.
- Tip the bottom of the unit onto the mounting plate hooks and let the plate take the weight.
- Rotate the top of the unit up against the wall and cabinet while your helper holds it.
- Feed the cord up through the cord hole as you go, before the unit is tight.
- From inside the cabinet, thread the two mounting bolts down into the top of the microwave. Start both by hand before tightening either.
- Tighten alternately and evenly. Snug, not gorilla tight. You are clamping into the appliance chassis.
- Check that the unit sits level and square in the opening.
Step 8: Filters, and finishing
Grease filters clip into the underside of the unit. They are aluminum mesh, and they go in with the correct orientation, which is marked. Most have tabs that must face a particular way for the filter to seat and for the airflow path to work. If a filter does not click in easily, you have it backward.
Clean them regularly in hot soapy water or on the top rack of the dishwasher. A clogged grease filter is the number one cause of a microwave hood that suddenly seems weak.
Charcoal filter, recirculating only. It sits behind the grille at the top front of the unit, usually reached by removing the grille screws inside the cabinet and then unclipping the grille. It is not washable. Replace it on the schedule in your manual, which is typically somewhere in the six to twelve month range depending on how much you cook.
Then test everything: light on both settings, fan on all speeds, turntable, and a cup of water for one minute to confirm it heats. Go outside and confirm the exterior damper flap is moving if you ducted out.
Safety and when to stop
- Two people. There is no clever way around this. Dropping an appliance of this weight onto a glass cooktop from head height ruins a cooktop and can ruin a hand.
- Do not mount below the manufacturer’s minimum clearance above the cooking surface. That number exists because the underside of the microwave sits over flame or an element.
- Confirm the upper cabinet can carry the load. Some cabinets have thin bottoms or a bottom that is not properly fastened to the sides. If the cabinet flexes when you pull down on it, reinforce it before you hang anything.
- Turn the breaker off before you work in a cabinet with a receptacle in it.
- Adding a receptacle or a dedicated circuit is licensed electrical work in Florida. So is anything at the panel.
- If the range below is gas and you are altering venting, take the manual’s gas-specific clearances seriously. They are frequently different from the electric ones.
- Do not cut into an exterior wall without knowing what is inside it. On block construction that includes rebar and filled cells, and on any construction it includes the possibility of wiring.
When it’s worth calling someone
An over-the-range microwave in a cabinet that already has a receptacle, a working duct and correct clearances is a good afternoon with a friend. Once it involves core drilling a block wall, a new duct run, a cabinet that needs to be raised, or an electrical circuit that does not exist yet, the job spreads out fast. I handle appliance installation across Broward, Palm Beach and north Miami-Dade, including the awkward two-person lifts that nobody wants to do twice.
If you are working through the kitchen generally, the garbage disposal troubleshooting guide covers the other appliance under there that people usually replace at the same time.
Questions people ask about this
Can one person install an over-the-range microwave?
No, and do not try. These units are heavy, the weight is high and away from your body, and you have to hold it against a wall bracket at head height while someone threads bolts down through the cabinet above. One slip drops an appliance onto a glass cooktop. Two people, every time, and read the shipping weight on the carton before you plan the lift.
What are the three venting options for an over-the-range microwave?
Recirculating, which filters the air through a charcoal filter and blows it back into the kitchen through the front grille. Vertical, which ducts straight up through the cabinet and out through the roof or an existing duct. And horizontal, which ducts straight back through the wall behind the unit to an exterior hood. Most microwaves support all three, but check the manual for yours, and either way you have to rotate the blower and set the damper correctly for whichever one you use.
How much clearance does an over-the-range microwave need above the cooktop?
Use the number in your specific installation manual, because it varies by model and by whether the range below is gas or electric. The common arrangement puts 30 inches between the cooking surface and the bottom of the upper cabinet, with the microwave occupying the lower part of that space. Do not guess and do not mount it lower to make it easier to reach, because the clearance is a fire safety specification, not a design preference.
Do I need a charcoal filter in a recirculating microwave?
Yes. In recirculating mode the air comes straight back into the room, and the charcoal filter is the only thing removing odor. Without it you are just blowing cooking smoke around the kitchen. Charcoal filters are not washable and get replaced on a schedule, typically somewhere in the six to twelve month range depending on the manufacturer and how much you cook.
Where does the power cord go on an over-the-range microwave?
Up through a hole in the bottom of the upper cabinet, to a receptacle inside that cabinet. That is the standard arrangement and it is what the cabinet hole in the template is partly for. Never run the cord through the vent opening, never pinch it between the microwave and the cabinet, and never use an extension cord.
Can I vent a microwave out through a concrete block wall?
It can be done, but it is a bigger job than most people expect. Most South Florida exterior walls are concrete masonry unit construction, so a horizontal vent means core drilling through solid block rather than cutting through a stud bay. You also need a properly flashed and sealed exterior hood with a damper that stands up to wind-driven rain, and in a condo you almost certainly need written association approval before making any new penetration in an exterior wall.