Storage & Assembly
Furniture assembly tips for flat-pack that lasts
How to assemble flat-pack furniture properly: sorting hardware, cam locks and dowels explained, why overtightening ruins particleboard, checking square, and anchoring.
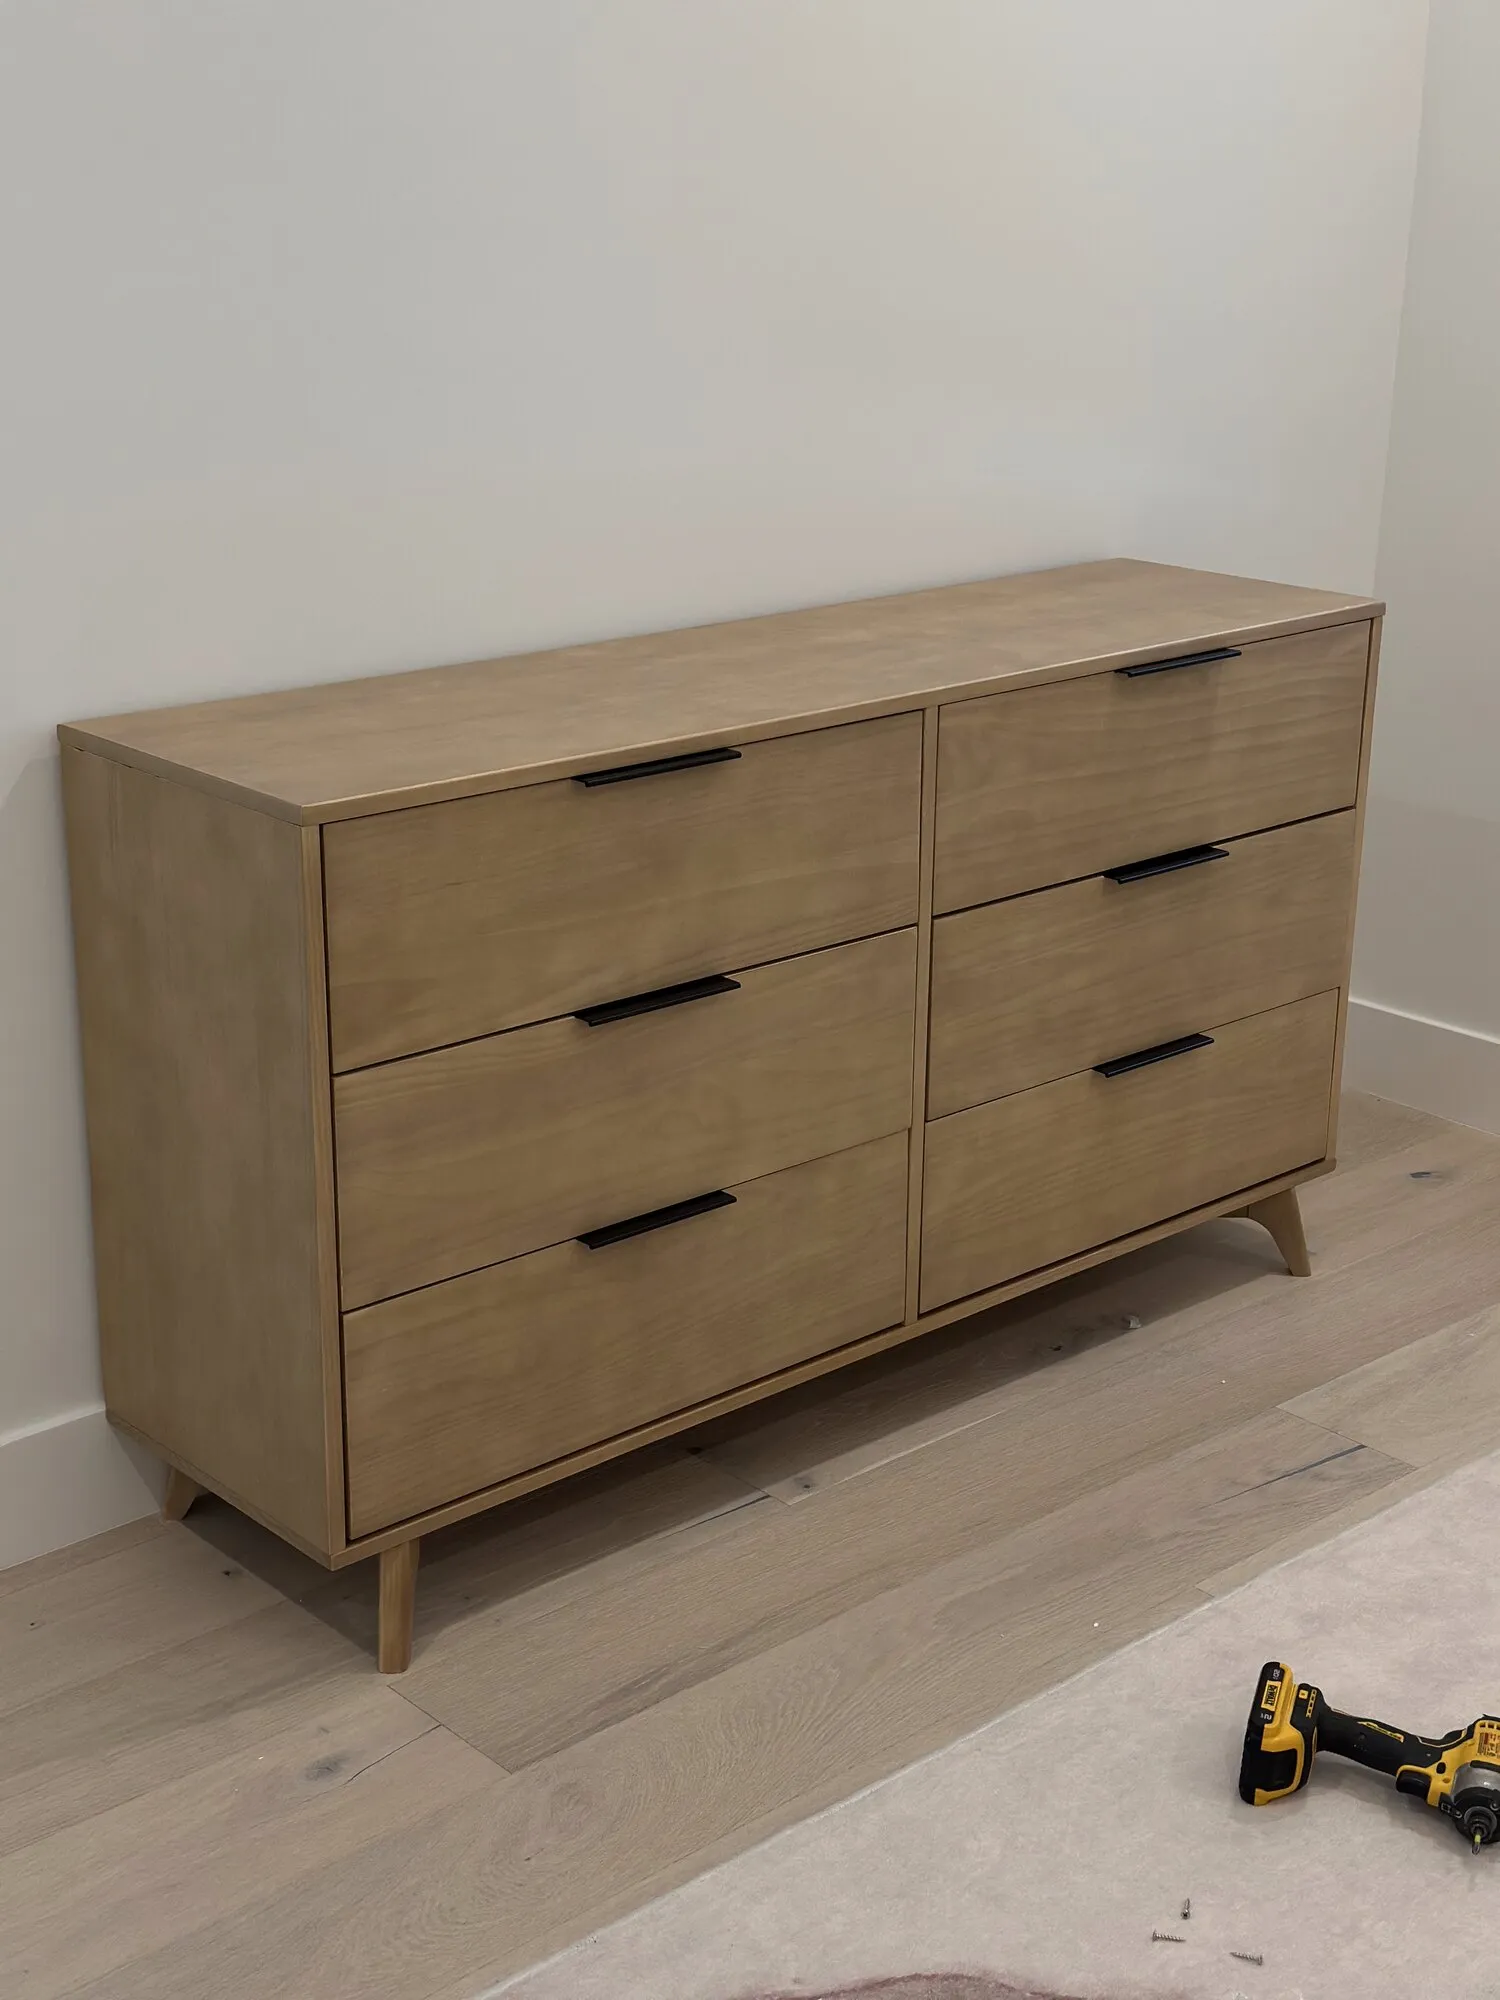
Flat-pack furniture is not difficult, but it is unforgiving. Every mistake you make is permanent, because the material has no second chances in it. Particleboard does not spring back, and a joint you have crushed will never be tight again.
The good news is that almost all the failures come from three or four specific errors, and every one of them is easy to avoid once you know it is coming.
Set up before you open the first bag
The single biggest time saver in this job happens before any assembly starts.
- Find a space bigger than the finished piece. You need room to lay panels flat, walk around them, and turn the case over. A hallway is not that space, and you do not want to be moving a half-built wardrobe to get to the light switch.
- Put down cardboard or work on carpet. Melamine and veneer surfaces mark on tile in seconds, and South Florida floors are mostly tile. The box the furniture came in is exactly the right material — flatten it and use it. On carpet, remember that a soft surface lets panels flex, so do the final tightening on something firm.
- Inventory every part against the parts list. Count the panels, count the hardware, and check each panel for shipping damage on the edges. Ten minutes now beats discovering a missing panel at step 34 with the case half built.
- Sort the hardware into a muffin tin, an egg carton, or a set of small bowls. Flat-pack hardware bags contain six things that look nearly identical and are not interchangeable. A 15 mm cam bolt and a 20 mm cam bolt in the same pile will cost you an hour and probably a blown-out panel.
- Lay panels out in the order the instructions use them, good face up, and mark the inside face lightly in pencil. Melamine panels frequently have a finished face and a slightly duller one, and pre-drilled holes tell you which way is up if you look.
- Read the whole instruction sheet first. Not because it is enjoyable. Because step 22 often depends on something you should have oriented correctly at step 4.
Tools and materials
- Cordless drill/driver with an adjustable clutch, set low
- Hand screwdrivers: Phillips #2, flathead, and a stubby for tight spots
- Hex/Allen keys — the supplied one works, but a hex bit in a driver handle is far kinder to your hands
- Rubber mallet
- Tape measure
- Torpedo level and a 4-foot level
- Muffin tin or small containers for hardware
- Pencil
- Wood glue, for dowels only
- Utility knife
- Clean cardboard or a moving blanket
- Anti-tip restraint kit, plus the correct wall anchors for your walls
- A second person for anything tall, wide or heavy
The hardware, and what each piece actually does
| Fastener | What it is | How it behaves |
|---|---|---|
| Cam lock and cam bolt | A round metal housing in one panel, a threaded post in the other. Turning the cam draws the post into it | Fast, reusable once or twice, and easy to strip. Half a turn past snug is the limit |
| Wooden dowel | A smooth ridged peg glued or pressed into aligned holes | Does the alignment and carries shear. Adds real rigidity if you glue it |
| Confirmat screw | A thick, coarse-threaded screw with a flat shoulder, driven into a stepped pilot hole | Strong for particleboard, but only in its own correctly sized pilot. Never drive one into an undersized hole |
| Machine screw into a threaded insert | A metal insert pressed into the panel | The strongest joint in the box. Still stops when the insert bottoms out |
| Back panel nails or staples | Thin fasteners through a hardboard back | Structurally critical. This is what stops the case racking |
| Shelf pin | A small metal or plastic pin in a line of holes | Carries the shelf load. Use all four, and check they are at the same height |
| Anti-tip restraint | A strap or bracket from the case to the wall | The only part that stops the piece falling forward |
Cam locks and dowels, explained properly
Nearly every flat-pack case joint uses the same pairing: dowels to locate and align, a cam lock to pull tight.
The dowels go in first. They sit in a hole in the edge of one panel and a matching hole in the face of another, and their job is to stop the joint sliding around and to carry sideways load. They do not hold the panels together on their own.
The cam bolt threads into a small insert in the panel edge, leaving a mushroom-shaped head standing proud. The cam housing drops into a 15 mm round hole in the mating panel with its slot facing you and, importantly, its opening facing the edge the bolt comes from. Look at the housing before you fit it — most have an arrow, and that arrow points at the cam bolt. Fit it the wrong way round and it will not catch at all.
When you turn the cam clockwise, an internal spiral captures the head of the bolt and pulls it in, drawing the two panels tight. That draw is about a quarter to a half turn of actual work. Everything past that is you crushing the hole.
Practical order: dowels in, panels offered together, cam bolts already fitted and standing proud, panels pushed home with a mallet on a scrap of wood, then cams turned.
The rule that matters most: do not overtighten
Particleboard and MDF hold fasteners by friction against compressed wood fiber. There is a point where the fiber has compressed as far as it can go, and past that point it crushes. Crushed fiber does not spring back, does not grip, and cannot be restored. The joint feels tight while you are still turning, then it feels loose forever.
So:
- Never use an impact driver on flat-pack. It applies far more torque than the material can survive and it does it in bursts too fast to feel. It will sink and strip a screw before your hand registers anything.
- Set the drill clutch low and use the drill only for long, repetitive screws — back panels, drawer bottoms, the eight identical screws on a bed frame.
- Finish by hand. The last quarter turn should be a hand screwdriver so you can feel the joint arrive.
- Stop at snug. Snug means the panels are touching with no gap and the fastener has stopped moving easily. That is the whole target.
- Do not go back around retightening everything at the end. This is a very common instinct and it is how good assemblies get ruined.
If a cam does strip, a repair is possible: a dab of wood glue and a matchstick or toothpick packed into the hole, left to dry, gives the fastener something to bite. It is a patch, not a fix, and it belongs on a joint that is not carrying load.
Assemble loose, square it, then tighten
This is the professional sequence and it is why a shop-assembled case sits flat and a rushed one rocks.
- Build the case with every fastener started but nothing fully tight. The case should be able to flex slightly.
- Measure both diagonals across the back opening, corner to corner. Two measurements. If they are equal, the case is square.
- If they are not equal, push the corner at the end of the longer diagonal until the numbers match. It takes very little force at this stage.
- Fit the back panel while it is square. The thin hardboard back is not decoration — it is the shear panel that triangulates the whole case. Once it is fastened, the case holds whatever shape it was in when you fastened it. Right or wrong.
- Now tighten everything, working around the case rather than finishing one corner at a time.
- Stand it up and check it. A case that was built square sits flat on a flat floor with no rock, and drawers will run smoothly. One that was not will rock, and every drawer will bind at the same corner.
A case built out of square is the root cause of most “the drawers do not close right” complaints. The drawers are fine. The box is a parallelogram.
Drawer gaps and how to fix them
Once the case is square and the drawers are in, the fronts almost never line up perfectly on the first go. That is normal and adjustable on most modern hardware.
Side-mount slides: the drawer box has a little vertical play in the mounting holes. Loosen the screws, shift the box, retighten. Small movements.
Undermount slides: most have three adjustments — side to side at the clip under the drawer front, height at the back clip, and sometimes tilt. Adjust one axis at a time and close the drawer after each change so you can see what happened.
Drawer fronts on separate panels: these are usually attached through slotted holes or on adjustable cams. Loosen, set the reveal with a couple of coins or scraps of cardboard as spacers to hold an even gap, then tighten.
Work from the bottom drawer up, and set the gaps against each other rather than against the case. The eye reads the relationship between drawers far more than it reads the outer edges.
Humidity, and what it does here
South Florida is hard on particleboard. It is wood fiber and glue, and it absorbs moisture readily through raw edges and unfinished backs. Swollen board never returns to its original dimension — the edge puffs up and stays puffed.
Practical consequences:
- Do not store flat-pack boxes in a garage while you get around to building them. Garages here run hot and humid.
- Do not build against a block exterior wall in a room that runs damp, and leave a small gap behind the piece rather than pressing it hard against the wall.
- Keep the raw edges dry. A dresser in a bathroom or a laundry room is living on borrowed time unless the edges are sealed.
- Wipe spills immediately. A puddle sitting on a melamine top overnight will find the seam.
Anchoring is not optional
This is the part of the job I will not soften.
Chests, dressers, bookcases and any tall piece can tip forward when a drawer is pulled all the way out and loaded, and further still when a child climbs on an open drawer. The center of gravity moves outside the footprint and the piece goes over. It is not an exotic failure — it is the designed behavior of a tall box with a heavy drawer extended, and the furniture itself weighs enough to injure a small child.
Clothing storage units sold in the US are covered by a federal stability rule and the industry standard ASTM F2057, and manufacturers ship anti-tip restraints in the box. Fit them.
How to do it properly:
- Find real structure. A restraint screwed into drywall alone is decoration. In a wood-framed wall, hit a stud. See how to find a stud.
- In a concrete block wall — which is most South Florida exterior walls and many interior ones — a stud finder will mislead you. There are furring strips and thin drywall over solid block. Drill into the block with a hammer drill and use a masonry sleeve anchor. Drywall anchors explained covers which anchor suits which wall.
- Fit the restraint to the back of the case near the top, into the thickest available material — the top panel or a rail, not the thin hardboard back.
- Keep the strap short and reasonably taut. A long slack strap lets the piece build momentum before it catches anything.
- Use both restraints if two are supplied. They are supplied in pairs for a reason.
- Re-check after a move, and after anyone has pulled the furniture out to clean behind it.
Also: put the heavy things in the bottom drawers, and never let a piece sit with more than one drawer open.
When to stop
Stop if a panel arrives cracked or the edge is blown out around a pre-drilled hole. Assembling damaged board just means the joint fails later, at a worse moment. Manufacturers will send a replacement panel.
Stop if a fastener strips in a joint that carries weight — a bed rail, a bunk bed connection, a wall-unit bracket. That is not a matchstick-and-glue situation.
And get a second person for anything tall going upright, for bunk beds, for wall beds, and for wardrobes. A large wardrobe carcass being tipped up alone is genuinely how people get hurt, and the piece rarely survives either.
When it’s worth calling someone
Bunk beds, wall beds, large wardrobes, multi-unit closet systems and anything where the box came with more than one instruction booklet are worth handing over, and Handy Daddy does furniture assembly across Broward, Palm Beach and north Miami-Dade including anchoring the finished piece properly to block walls. If you are weighing what else on the list to take on yourself, DIY or hire a handyman is a straight answer, and overhead garage storage guide covers the other big load-carrying job people underestimate.
Questions people ask about this
Why does flat-pack furniture get wobbly after a while?
Almost always because the joints were overtightened during assembly or the case was fastened out of square. Particleboard holds a fastener by friction against crushed wood fiber, and once that fiber is crushed past its limit it never grips again. A joint that felt tight on the day works loose within months and cannot be retightened.
How tight should I tighten a cam lock?
Until it stops turning easily and no further, which is usually about a half turn past the point the panels pull together. Cam locks are designed to draw two panels tight with a quarter to half turn, not to be cranked. If the cam keeps turning without resistance the housing has stripped its seat and the joint is done.
Should I use a drill to assemble flat-pack furniture?
Use a drill for the long, repetitive screws only, on the lowest clutch setting, and finish every fastener by hand. Never use an impact driver on particleboard — it delivers far more torque than the material can survive and will bury and strip a fastener before you hear it happen. Hand-tightening the last quarter turn is what saves the joint.
How do I know if a cabinet is square?
Measure both diagonals across the case. If the two measurements match, the case is square; if they differ, push the long diagonal until they match before you fix the back panel. The thin back panel is what locks a case square, so check the diagonals before you nail or screw it on, not after.
Do I really need to anchor a dresser to the wall?
Yes, and it is the single most important part of the assembly. Tall chests and dressers can tip when a drawer is pulled out and weighted, and a child climbing an open drawer is the classic scenario. Anti-tip restraints ship with most clothing storage units sold in the US and take five minutes to fit. Fit them even if the piece feels heavy and stable.
Can I take flat-pack furniture apart and move it?
You can, but expect it to be weaker every time. Cam housings and dowel holes wear with each cycle, and particleboard does not restore itself. One careful disassembly and reassembly is usually fine if you add wood glue to the dowels on rebuild. Three moves and the piece will never sit square again.